Create an app registration in Microsoft Entra ID
To enable the Aptean TLx connector to authenticate and exchange data with Business Central, you must create an app registration in Microsoft Entra ID (formerly known as Azure Active Directory).
Create an app registration
To create an app registration in the Microsoft Entra ID admin center, generate a client secret, and grant Business Central API permissions, follow these steps:
-
Open the Microsoft Azure portal and log in with your credentials.
-
Select the All Services menu.
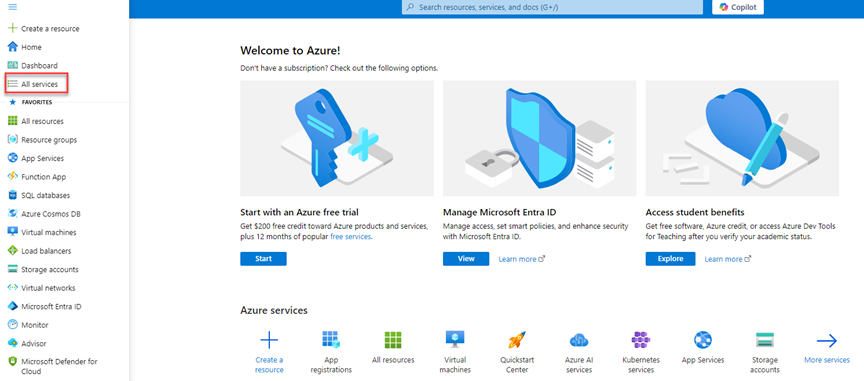
The All services page opens.
-
On the search bar, enter App registrations, and then select the related link from the results.
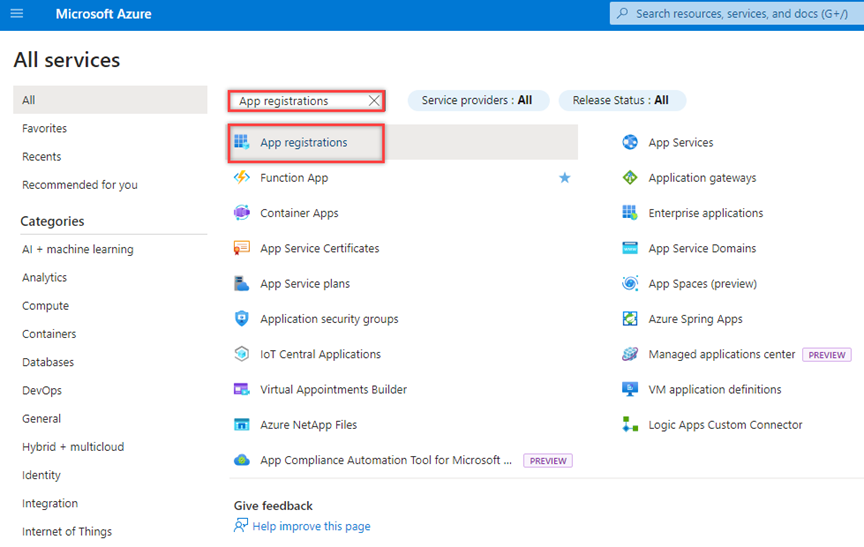
The App registrations page opens.
-
Select New registration.
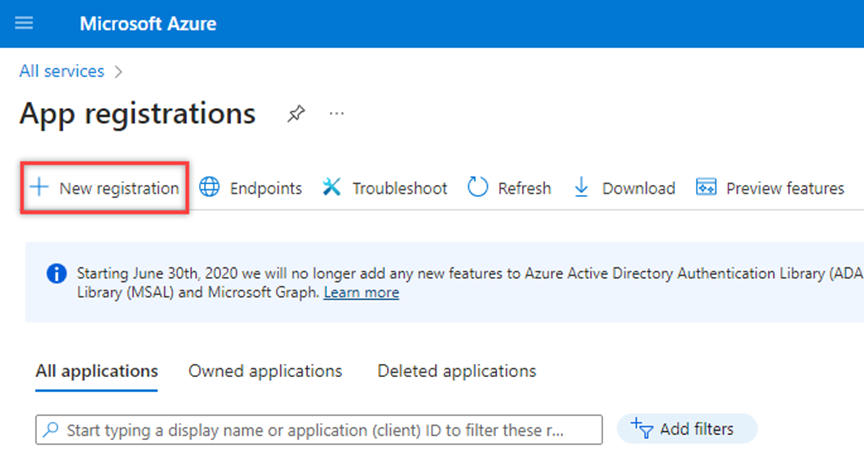
The Register an application window opens.
-
In the Name field, enter Aptean TLx.
-
In the Supported account types field, select the Accounts in this organizational directory only option.
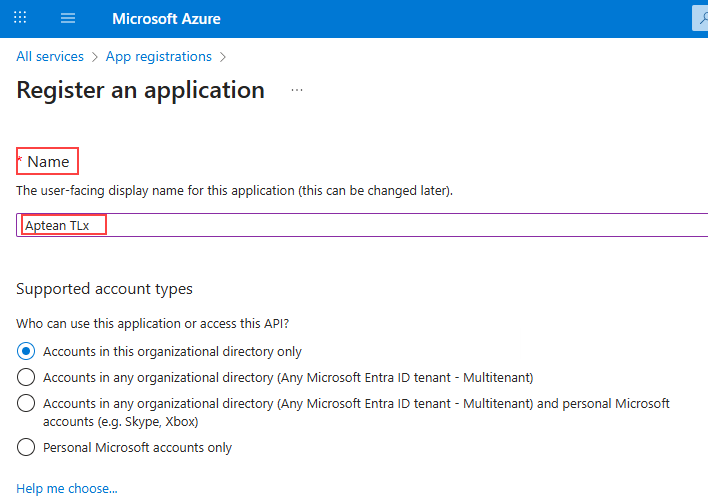
-
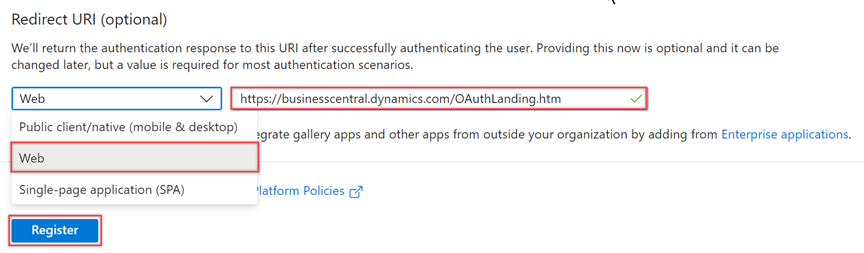
In the Redirect URI (optional) section, in the Select a platform dropdown, select Web.
-
Enter https://businesscentral.dynamics.com/OAuthLanding.htm as the redirect URL.
-
Select Register to complete the application registration process.
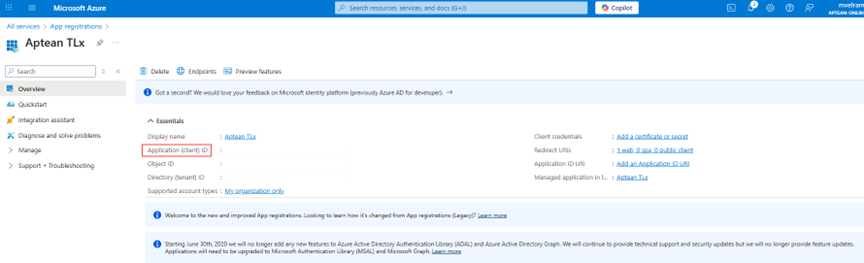
The Aptean TLx connector has been registered. You can view the client ID and the related information on the page. Make sure to note this value, as it will be required later in the setup process.
Generate a client secret
To generate a client secret, follow these steps:
-
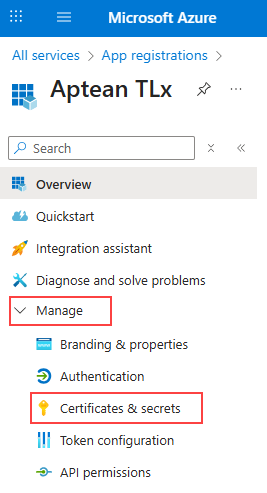
On the menu bar, select Manage > Certificates & secrets.
-
Select New client secret.
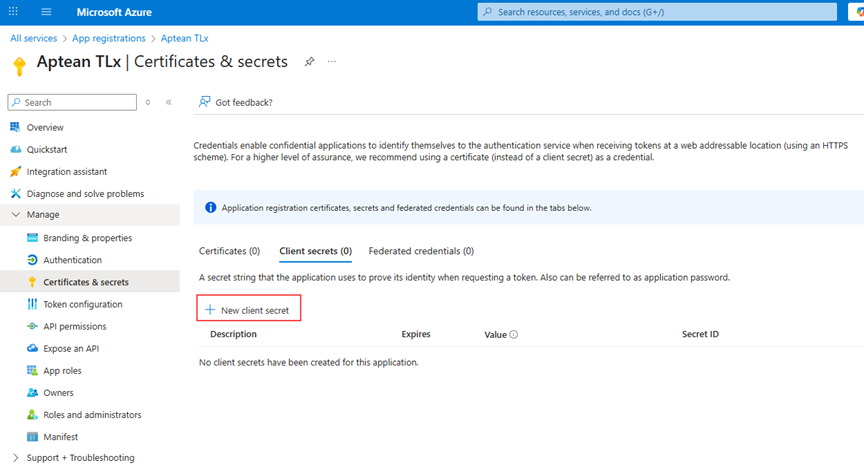
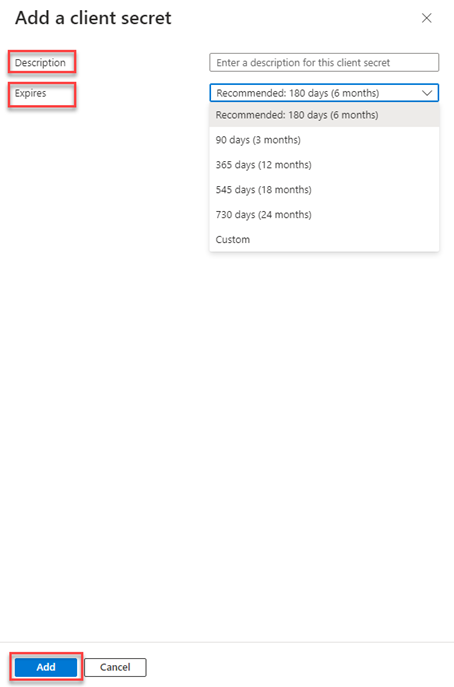
The Add a client secret window opens.
-
In the Description field, enter a description for the client secret.
-
In the Expires field, select the desired expiration period for the client secret.
-
Select Add.
-
After the secret key is added, copy the data in the Value field to your clipboard from the Client secrets tab. Make sure to save this value, as it will be needed later in the setup. The secret key is not visible after you navigate away. If you lose the secret value, you will need to create a new secret key.
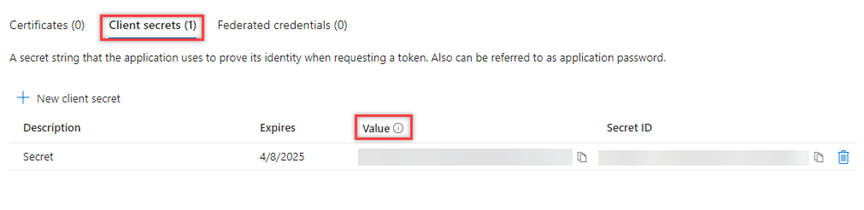
The secret key is generated.
Configure API permissions
To configure the necessary API permissions, on the menu bar, select Manage > API permissions.
-
Select + Add a permission.

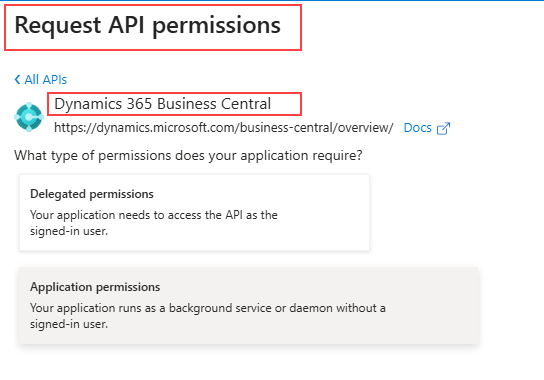
The Request API permissions page opens.
-
Select Dynamics 365 Business Central.
-
Select the Delegated permissions tile.
-
In the Select permissions field, select the required permissions.
-
Select Add permissions.
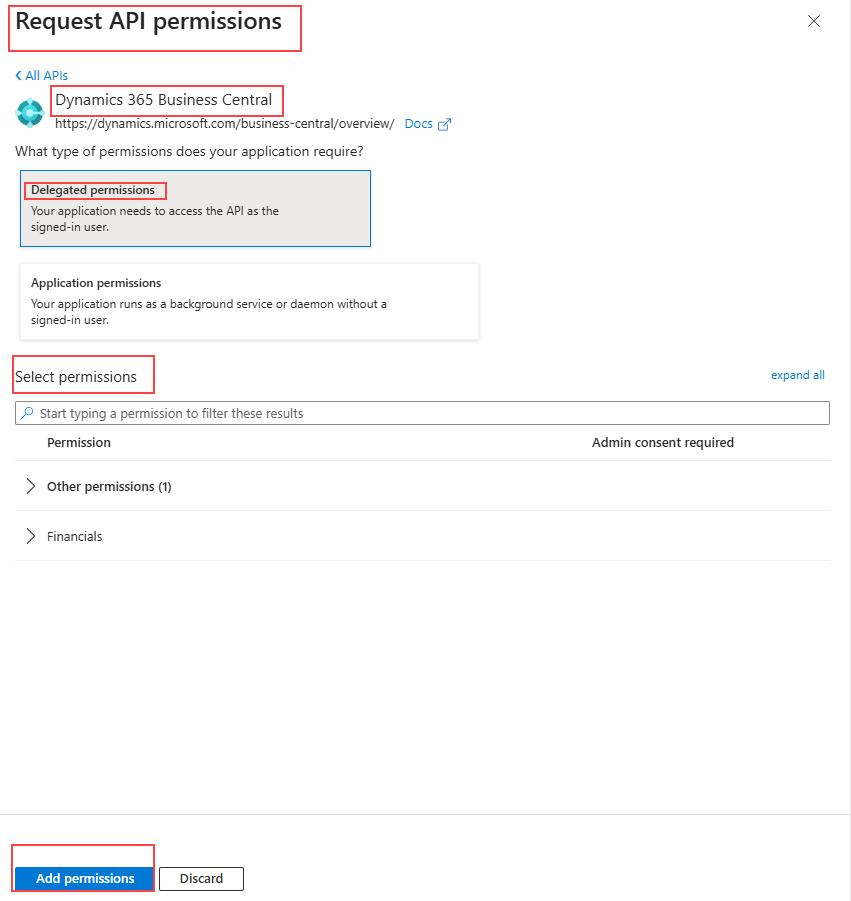
After all the necessary permissions are added, your API permissions are configured.
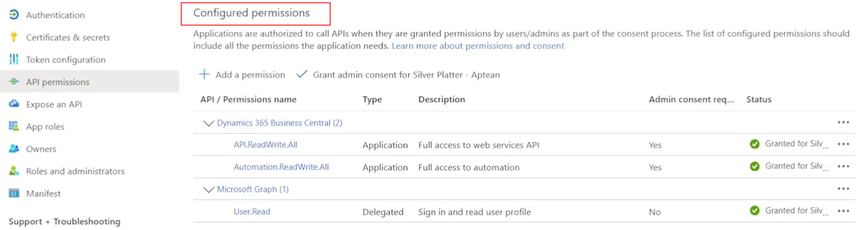
App registration is complete. Make sure to note down the following two fields:
- Client ID
- Secret Value