Walkthrough: Direct put-away
This walkthrough explains how to use direct put-away to receive and put away items in a single process on the scanner by using the Take and Place screens.
Your warehouse receives items from multiple vendors around the world. Vendors may provide different types of pallet information. Some vendors include full labeling with license plate numbers, while others provide only expiration dates or details from the bill of lading.
To maintain consistency in the warehouse, you label all pallets with your own internal labels when the items are received. This approach ensures that every pallet has a standardized label that can be scanned, which helps improve warehouse efficiency.
[!NOTE]
The direct put-away module supports only license plate tracked items.
Setup
You must complete the required setup before you can use the direct put-away process in the warehouse.
Direct put-away module
- Select the Search icon
 , enter Locations, and then select the related link.
The Locations list page opens. - Select the WMS location.
The Location Card page opens. - Select the Configure WMS action.
The WMS Location Card page opens. - On the action bar, select Modules on Scanner.
The Modules on Scanner List page opens. -
Select the Direct Put-Away module.
The Module Settings Card page for WMS direct put-away opens.When you work in a non-standard WMS test environment with the latest version, it is recommended to create the default configuration.
If you are working in an existing environment, create a backup or copy the current setup before you use the Create Default action.
You can execute the Create Default Postback Fields action to update the postback fields and the Create Default Validations action to update the validations.
To review the configuration, follow these steps:
- Select the Postback Fields action to open and review the postback fields.
- Select the Validations action to open and review the validations.
- Select the Sub Module Templates action to open the Sub Module Templates page.
- Change the Mode field value to Take.
The direct put-away process, similar to ad hoc movement, uses the Take and Place actions to move items.
- Use the Take action to pick up items and place them on the forklift when moving items or on the receipt dock floor when receiving items.
- Use the Place action to put the items in the destination bin.
The Mode setting determines how the Take and Place modes are used in ad hoc movement. The following modes are available:
- Selected: The Ad Hoc Movement module opens in the mode that was last used. To change the mode, long-press the mode line on the scanner.
- Take: The Ad Hoc Movement module always opens in the Take mode. To change the mode, long-press the mode line on the scanner.
- Place: The Ad Hoc Movement module always opens in the Place mode. To change the mode, long-press the mode line on the scanner.
- Alternating Take/Place (used with alternating count): The Ad Hoc Movement module opens in the mode that was last used. The system automatically switches from the Take to Place mode after the number of registrations specified in alternating count is reached. This option is useful when you operate a double or quad forklift for pallet storage. If alternating count is set to 0, the system switches to the Place mode after the first registration, which behaves the same as when the value is 1. The system automatically switches from the Place to Take mode when no items remain in the Place mode.
- Fixed Take: The module always opens in the Take mode, and you cannot change the mode.
- Fixed Place: The module always opens in the Place mode, and you cannot change the mode.
Unless the mode is fixed, you can switch between the Take and Place modes by long-pressing the mode line on the scanner.
Bins
- Select the Search icon , enter Locations, and then select the related link.
The Locations list page opens. - Select the WMS location.
The Location Card page opens. - On the action bar, select Bins.
The Bin List page opens. - Filter the list on K-3 code.
Check the Execute Print Direct Put Away field value. If needed, personalize the page.
As explained in this flow, you create new lot numbers based on the expiration date for all items when they arrive. To support this process, you review and update the setup for certain items.
Item L1000: LPN and item tracked (Production)
- Select the Search icon , enter Items, and then select the related link.
The Items list page opens. - Select the L1000 item.
The Item Card page opens.
On the Advanced Warehouse Management FastTab, verify that the License Plate Tracking Code field value is set to ALL. This setting requires the use of a license plate for both inbound and outbound warehouse flows.
On the Warehouse Management System FastTab, verify that the License Plate Generation field value is set to Always.
On the Item Tracking FastTab, verify that the Item Tracking Code field value is set to LOTALL. In this configuration, the Warehouse Management System FastTab in the item tracking code setup defines the number series value in the Lot No. Generation field.
On the Item Tracking FastTab, verify the value in lot numbers. This number series is used to generate the lot numbers. Additionally, verify the expiration calculation. This date formula is used to calculate the expiration date when the items are received. - Select the units of measure.
The Item Units of Measure page opens.
Verify that the quantity per unit of measure is correctly defined for the PALLET code. - Close all open pages.
As a result, when this item is received, the system automatically calculates the expiration date based on the expiration calculation, generates a lot number based on the lot number generation setup in the item tracking code, and creates license plate numbers according to the Full License Plate Qty. field configuration.
Item L1900-S: Only LPN tracked (Purchase)
- Select the Search icon , enter Items, and then select the related link.
The Items list page opens. - Select L1900-S item.
The Item Card page opens.
On the Advanced Warehouse Management FastTab, verify that the License Plate Tracking Code field value is set to ALL. This setting requires the use of a license plate for both inbound and outbound warehouse flows.
On the Warehouse Management System FastTab, review the License Plate Generation field value. The value is initially blank. - Change the License Plate Generation field value to Always.
- Change the Print Set field value to LICENSE PLATE.
On the Item Tracking FastTab, verify that the Item Tracking Code field value is blank. This means that lot numbers are not required for this item. - Select the units of measure.
The Item Units of Measure page opens.
Verify that the quantity per unit of measure is correctly defined for the PALLET code. - Close all open pages.
Because this item does not use item tracking, the system generates license plate numbers based on the Full License Plate Qty. field configuration.
Item L1908-S: LPN and item tracked (Purchase)
- Select the Search icon , enter Items, and then select the related link.
The Items list page opens. - Select the L1908-S item.
The Item Card page opens.
On the Advanced Warehouse Management FastTab, verify that the License Plate Tracking Code field value is set to ALL. This setting requires the use of a license plate for both inbound and outbound warehouse flows.
On the Warehouse Management System FastTab, review the License Plate Generation field value. The value is initially blank. - Change the License Plate Generation field value to Always.
- Change the Print Set field value to LICENSE PLATE.
On the Item Tracking FastTab, verify that the Item Tracking Code field value is set to LOTALLEXP. In this configuration, no values are defined on the Warehouse Management System FastTab in the item tracking code setup. - For lot number generation, select the required build lot number from expiration date.
- In Expiration Date Lot No. Format field, enter EDL<Year,2>.<Month,2><Day,2>.
- Select the unit of measure.
The Item Units of Measure page opens.
Verify that quantity per unit of measure is correctly defined for the PALLET code. - Close all open pages.
As a result, when this item is received, the system automatically generates a lot number based on the lot number generation setup in the item tracking code and creates license plate numbers according to the Full License Plate Qty. field configuration.
Process flow
This section explains the end to end process, starting from creating a purchase order to receiving the items in the warehouse.
Purchase order to receipt
Follow these steps to create a purchase order and proceed with the receiving process.
- Select the Search icon , enter Purchase Orders, and then select the related link.
The Purchase Orders list page opens. - Select the New action.
- In the Vendor Name field, enter 61000 (Electronics Ltd.).
- In the Location Code field, enter WMS.
-
Fill in the line details:
Item Quantity Unit of Measure Code L1000 40 PCS L1900-S 6 PALLET L1908-S 120 PCS -
Select the Create Whse. Receipt action.
The Warehouse Receipt page opens. - Turn on the Release To Scanner toggle.
The system creates a line in the WMS activity list. This line appears in the document list on the scanner.
The Release to Scanner must be turned on by default for a specific location, and you can configure this in the WMS warehouse receipt module.
On the scanner
- Open the WMS App on the scanner and login to Aptean warehouse management system location.
- Select the Inbound group.
- Select the Direct Put-Away module, the document list opens.
- Select the document line with the correct warehouse receipt number, the item list opens.
-
In the item list, you can view:
- The modus line, currently Take
- The item lines, currently 3 lines
On the bill of lading:
- Item L1000: No tracking information
- Item L1900-S: No tracking information
- Item 1908-S: 72 pcs with expiration date 22/08/29 and 48 pcs with expiration date 14/09/29
Receive item L1000
In this step, you receive the L1000 item using the scanner.
- Enter 38 in the Qty field.
- Long-press the item line for L1000.
The system prompts you to confirm the quantity because the entered quantity is not an exact multiple of the full license plate quantity. By default, the system assumes that you receive full license plates and one partial license plate.
In this scenario, you want to receive 8 full license plates and 2 partial license plates, each with a quantity of 3. - Change the quantity to 32, and then confirm.
The remaining quantity for item L1000 is 6. - In the Qty field, enter 3.
- Long press the item line for L1000.
The remaining quantity for item L1000 is 3. - Long press the item line for L1000 again.
- Confirm the quantity 3.
The line for item L1000 is no longer displayed. - Long press the take line.
The mode changes to Place. - Scroll through the list. The system displays separate lines for each license plate number, based on the confirmed quantities.
-
Scan the bin where you want to place the license plates.

All license plates are moved to the scanned bin.
In Business Central, you can review bin contents, warehouse entries, and detailed warehouse entries. At this stage, only the put-away movement entries are created. The warehouse receipt is not posted yet. You can also review the Warehouse Receipt page to verify the current status.
To post the warehouse receipt lines from the scanner, complete the receipt on the scanner.
- Select the Complete button on the scanner.
- Select Yes to confirm and post the receipt.
In Business Central, the system creates the related warehouse entries, detailed warehouse entries, and item ledger entries for the posted warehouse receipt.
You can also review the Warehouse Receipt page. The line for L1000 item is posted and is no longer displayed in the warehouse receipt.
Receive 6 full license plates of item L1900-S
- Select the document line with the correct warehouse receipt number.
The item list opens in the Take mode. - Long press the item line for L1900-S.
- Confirm the quantity 96.
The line for L1900-S is no longer displayed. - Long press the take line.
The mode changes to Place. - Scroll through the list. The system displays separate lines for each license plate number, based on the confirmed quantities.
- Long press the first line that contains item, L1900-S.
A dialog box prompts you to enter the bin where the license plate will be placed. -
Scan the bin where you want to place the license plate.
The license plate is moved to the bin.
In Business Central, you can review the label output files. The top label represents the label that was generated for the moved license plate.
- Long press the first line that contains item, L1900-S.
A dialog box prompts you to enter the bin where the license plate will be placed. -
Scan the bin where you want to place the license plate.

The license plate is moved to the bin.
-
Scan the bin where you want to place the remaining license plates.

All license plates are moved to one of the two bins.
In Business Central, you can review bin contents, warehouse entries, and detailed warehouse entries. At this stage, only the put-away movement entries are created. The warehouse receipt is not posted yet. You can also review the Warehouse Receipt page to verify the current status.
You can also review the label output files. The top labels represent the labels that were generated for the moved license plates.
Receive item L1908-S with expiration dates
In this step, you receive item L1908-S with different expiration dates.
- Long press the Place line.
The mode changes to Take. - In the Qty field, enter 72.
- Long press the item line for L1908-S.
A dialog box prompts you to enter the expiration date. - Enter 290822.
The remaining quantity for item L1908-S is 48. -
Scan the item, quantity and expiration date of one of the remaining license plates.
The remaining quantity on the item line is 24.
-
Scan the item, quantity, lot number and expiration date of the last remaining license plate.
The item line disappears.
- Long press the Take line.
The mode changes to Place.
Review the item lines. The system prioritizes scanned information over system-generated information.
In this setup, because license plate generation is set to Always, the system generates license plate numbers. - Select the input field in the header.
- Enter WM-BULK-33 as the bin, and then select Add.
All license plates are moved to the WM-BULK-33 bin. - Select Complete on the scanner.
- Select Yes to confirm and post the receipt.
In Business Central, the system creates the related warehouse entries, detailed warehouse entries, and item ledger entries for the posted warehouse receipt.
The warehouse receipt is removed because it is fully posted.
Some vendors provide modern and complete labeling, including lot numbers and SSCC numbers, which you can use directly in your warehouse. However, not all vendors provide this information.
As a result, you can use the vendor-provided lot numbers when they are available, instead of always creating new lot numbers and labels.
Changes in setup to support items with correct labels
This section explains the system setup to process items with correct vendor labels without creating new labels during receipt.
Direct put-away module
Follow these steps to update the setup to support items that already have correct vendor labels.
- Open the Locations list page.
- Select the WMS location.
The Location Card page opens. - Select Configure WMS.
The WMS Location Card page opens. - Select Modules on Scanner.
The Modules on Scanner List page opens. - Select Direct Put-Away.
The Module Settings Card page for WMS direct put-away opens. - Select Postback Fields to open the configuration.
-
Add a new line in the postback fields.
Field No. Document Line Field No. Request Job Field No. 7 21 32 -
Close the postback fields.
- Select the Validations action to open the validations.
- Change the Lotno. validator as Tracking.
- Close all the open pages.
As explained in this flow, you do not always create lot numbers. For some items, you can scan and use existing lot numbers provided by the vendor.
Item L1908-S: LPN and item tracked (Purchase)
- Open the Items list page.
- Select the item, L1908-S.
The Item Card page opens.
On the Advanced Warehouse Management FastTab, verify that the License Plate Tracking Code field value is set to ALL. This setting requires the use of a license plate for both inbound and outbound warehouse flows.
On the Warehouse Management System FastTab, verify that the License Plate Generation field value is set to Always. - Clear the License Plate Generation field value.
- Clear the Print Set field value.
On the Item Tracking FastTab, verify that the Item Tracking Code field value is set to LOTALLEXP. In this configuration, no values are defined on the Warehouse Management System FastTab in the item tracking code setup. - Clear the Lot No. Generation field value.
- Close all open pages.
Purchase order to receipt
Follow these steps to create a purchase order and proceed with the receiving process:
- Open the Purchase Orders list page.
- Select New.
- In the Vendor Name field, enter 62000 (WalkerHolland).
- In the Location Code field, enter WMS.
-
Enter the required details in the Lines section.
Item Quantity Unit of Measure Code L1000 20 PCS L1908-S 60 PCS -
Select the Create Whse. Receipt action.
The Warehouse Receipt page opens. - Turn on the Release To Scanner toggle.
On the scanner
Follow these steps to process the receipt on the scanner.
- Open the WMS scanner and sign in to Aptean Warehouse Management System.
- Select Inbound.
- Select Direct Put-Away.
The document list opens. - Select the document line with the correct warehouse receipt number.
The item list opens.
Review the information on the item list:
- The Mode line, currently set to Take
- The item lines, currently displaying 2 lines
Review the details from the bill of lading:
-
Item L1000: No tracking information
-
Item L1908-S:
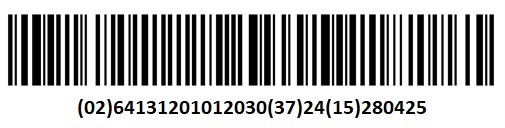
- 36 pcs with lot number C45.822 and expiration date 25/04/28
- License Plate No. 202612342121441346, 12 pcs
- License Plate No. 202612342127291198, 24 pcs
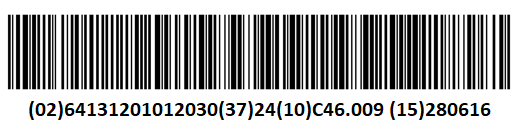
- 24 pcs with lot number C46.009 and expiration date 16/06/28
- License Plate No.: 202612342063411315, 24pcs
- 36 pcs with lot number C45.822 and expiration date 25/04/28
Receive item L1000
- Long press the item line for L1000.
- Confirm the quantity as 20.
- Long press the Take line.
The mode changes to Place. - Scroll through the list. The system displays separate lines for each license plate number, based on the confirmed quantities.
-
Scan the bin where you want to place the license plates.
All license plates are moved to the scanned bin.
In Business Central, you can review the bin contents, warehouse entries, and detailed warehouse entries. At this stage, only the put-away movement entries are created. The warehouse receipt is not posted yet. You can also review the Warehouse Receipt page to verify the current status.
Scan and receive item L1908-S
- Long press the Place line.
The mode changes to Take. -
Scan the item, quantity, and expiration date for one of the remaining license plates.
-
Scan the license plate number.

The quantity in the line changed to 36.
-
Scan the item and quantity.

-
Add the expiration date 280425 manually.
-
Scan the lot number.

-
Scan the license plate number.

The quantity in the line updates to 24.
-
Scan the item, quantity, and expiration date.
-
Scan the lot number.

-
Scan the license plate number.

The item line is no longer displayed.
- Long press the Take line.
The mode changes to Place.
Review the item lines with the scanned information. -
Scan the bin where you want to place the license plates.

All license plates are moved to the WM-BULK-33 bin.
- Select the Complete button on the scanner.
- Select Yes to confirm and post the receipt.
In Business Central, the system creates the related warehouse entries, detailed warehouse entries, and item ledger entries for the posted warehouse receipt.
The warehouse receipt is removed because it is fully posted.
In the above flow, a single warehouse employee performs both receiving and put-away activities by switching between screens. By using fixed take and fixed place modes, you can assign one employee to handle receiving and another to handle put-away, which helps improve efficiency in warehouse operations.